RINGMAT SUPPORT SYSTEM Awarded hi-fi+ PRODUCT of the YEAR 2000, the RINGMAT SUPPORT SYSTEM continues in its present successful form. With the addition of the new ANNIVERSARY GOLD SPOT RINGMAT, LP BLUE and STATCAP and the MkII version of the Ringcap, all released since the Award, analogue reproduction now reaches a totally new level of performance.
Ringmat Support Systems are modular by design and they all revolve around the use of a Ringmat, which is the anchor component. Ringmat Support Systems are a more cost-effective way of acquiring all the four modules, and come in a box (rather like a boxed set of LPs) with a full set of instructions. Except where Ringmat Spacers are eventually desired, the extra cost of acquiring the modules individually is not very much more. | |

| The four principal components are: The Full Version includes a Spacer Mat and a standard set of 8 Ringmat Spacers (for more information, click here), a Ringmat of choice, a Ringcap and a choice of the Standard LP Statmat or the LP Blue Statmat and Statcap. It comes with a full set of instructions and, as a complimentary bonus, the booklet ‘How to Set Up and Fine Tune a Turntable’ by John Rogers (for more information, click here).
The MRA is a starter/economy version. The only difference from the Full Version is that the MRA Version only has 1 Clear and 1 Slate Spacer instead of the standard set of 8 Spacers (for more information, click here). Additional individual Spacers can be purchased separately. Nor does the MRA version include the booklet ‘How to Set Up and Fine Tune a Turntable’ by John Rogers. |
Many customers start with the Ringmat and add the other modules later. For those customers starting with a Ringmat, we have written the note ‘Beyond Ringmat’ (to read this, click here). USING THE RINGMAT SUPPORT SYSTEM - IN PICTURES
Stage 1 - Place the Ringmat Spacer Mat on the bare platter.

Stage 2 - Place Ringmat Spacers on the Spacer Mat in accordance with the guidance contained in the Support System Instruction Book, ensuring that the Spacers engage the "stud" on the outside edge of the Spacer Mat.

Stage 3 - Place the LP Blue Statmat (or the standard LP Statmat) on the Spacers. At all Stages, align the pattern of the cut outs in the materials the same way.

Stage 4 - Place the Ringmat over the spindle, so that it rests over the earlier Support System components. The LP Statmat fits within the inner ring on the underside of the Ringmat and does NOT affect the height or stability of the Ringmat. Where the Ringmat is not an Anniversary model, and therefore does not have a cutout pattern to guide placement, see that the "RINGMAT DEVELOPMENTS" label is positioned, as shown in the picture below, to the right of the two circular holes in the Ringmat Spacers.

Stage 5 - Place the Statcap on the Ringmat as one of two optional positions for the Statcap. Each LP has a good side and a not so good side due to the natural polarity of the materials used for stamping out LPs. This could be the 'B' side, but it could equally well be the 'A' side. You can only reliably tell which is which by playing both sides (or just one side once your ears have become attuned to the situation) and noting, for future reference, which is which. Where the good side is to be played, place the Statcap as shown here for Stage 5.
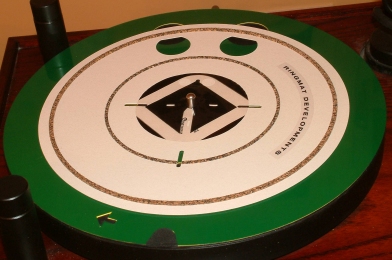
Stage 6 - Place the record to be played on the Ringmat and than place the Ringcap over the spindle and let it rest on the record label.
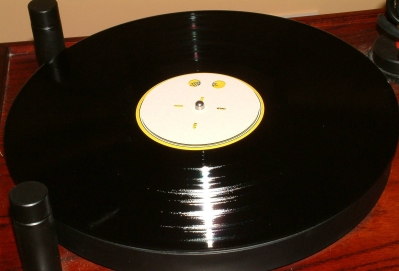
Stage 7 - When playing the less good side of the LP (see Stage 5 above for explanation), place the Statcap on the Ringcap.

At all Stages, align the pattern of the cut outs in the materials the same way.
|

